For 4 lug wheels with 4 x 130 lug geometry
Fits Ball Joint Front End VW Standard Beetles from 1966 through 1977
and 1966 Karmann Ghias.
Does not require spindle replacement.
The kit includes a caliper bracket that mounts to the stock height
drum brake spindle and greatly improves the stopping power.
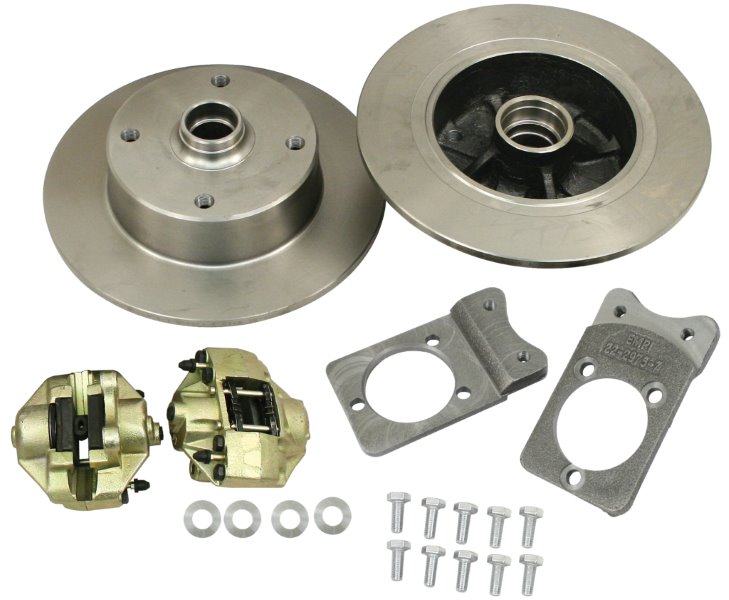
The disc brake kit includes caliper brackets, calipers & pads,
mounting hardware and instructions.
The bolt on disc brake conversion kit will not fit with stock VW disc brake,
drop spindles or disc brake drop spindles.
Wheel studs are not included.
Must have 15" wheels on car.
Do not use this disc system with 14" wheels.
This kit will only work with stock-style, drum brake spindles.
This kit includes:
Front Brake Rotors
Brake Calipers & Pads
Caliper Mounting Brackets
Mounting Hardware & Instructions
Must use late model ball joint bearings and seals.
 Questions?
Talk to us!
Questions?
Talk to us!
The procedures for removing and installing ball joints vary with the model year. For example, 1974 and later Beetles have differing procedures from earlier ball joints. The following is to be taken as general and to help you decide on doing the ball joint work yourself. The best and most fully illustrated instructions on the ball joints and on all projects related to the front suspension are to be found in the Bentley VW manuals. For ball joint work and all shop work you may prefer printed instructions to dvd's !!
The front suspension ball joints fit into sockets on the control arms. To remove:Remove ball joint spindle assembly, loosen ball joint retainer nuts and remove the ball joints.
Inspect for wear and clean. Maximum wear on upper ball joint is .002in and the upper ball joint wear limit is .08 in. To measure the ball joint wear (clearance) remove the ball joint seal and use your feeler guage.
Check the free movement of the joint when greased. The joints should be easy moving.
To install: Insert the ball joints into control arm sockets. The mark at the grease nipple should be toward the front and the ball joints should be fully into the slots. The star washer and retainer nuts are applied (80 lb-ft.) This is for earlier ball joints (up to 1963). Later ball joints are fitted with a hex nut and a wave washer.
Ball joints up to 1963 required periodic lubrication. Newer ball joints are packed with grease. To be safe grease can be periodically added to the ball joints via the grease nipple (which is under a plastic plug on the ball joint.)
The later ball joint has a locating flat at the threads. To apply the hex nut to the ball joint use a 30mm wrench. The seal is fastened with a thin wire at the top and a retaining ring at the bottom.